Add the Humm Landing Page to your website
1. Navigate to Online Store > Themes > Pages. In the top right corner click the Add Page button.
2. Title the page Humm and click on the <> button, as highlighted below.
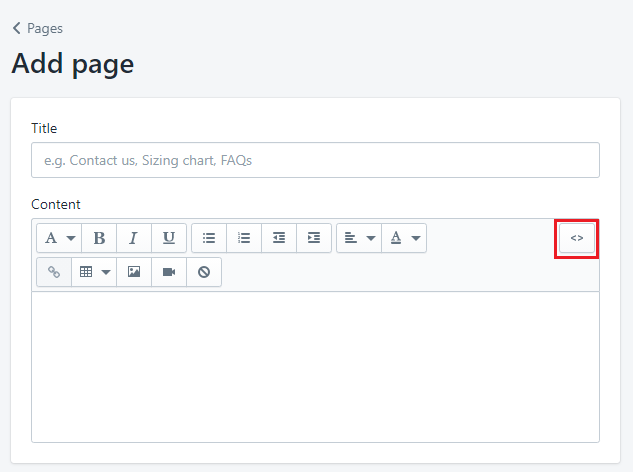
3. Paste the below landing page script in the content box. Choose the script based on the plans you have available (Little and/or big things). Click Save.
Little things
<script id="humm-landing-page-little-online" src="https://widgets.shophumm.co.nz/content/scripts/landing-page-little-online.js"></script>
Big things
<script id="humm-landing-page-big-online" src="https://widgets.shophumm.co.nz/content/scripts/landing-page-big-online.js"></script>
Little + Big things
<script id="humm-landing-page-little-big-online" src="https://widgets.shophumm.co.nz/content/scripts/landing-page-little-big-online.js"></script>
4. Navigate to Online Store > Themes > Navigation and choose the appropriate menu to display the humm landing page.
Add the Humm Payment tile to your website footer
1. Download the humm payment tile here
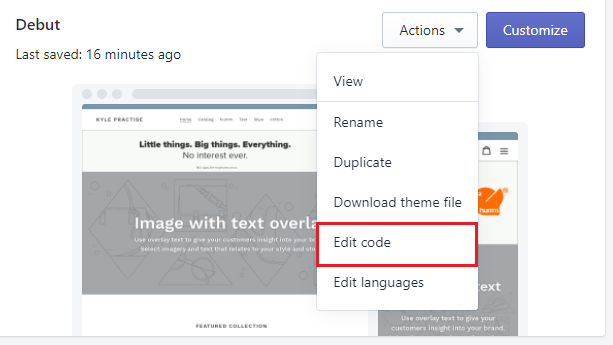
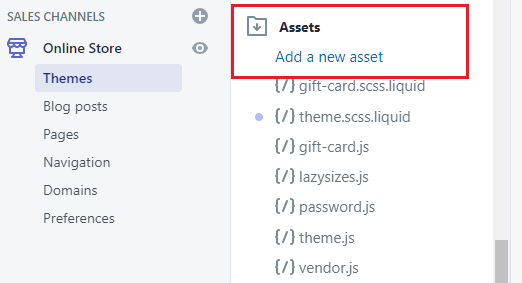
2. Navigate to Online Store > Themes > Actions > Edit Code > Assets and click the Add a new Asset button
3. Click the Choose file button and select the recently downloaded humm payment tile and click upload asset.
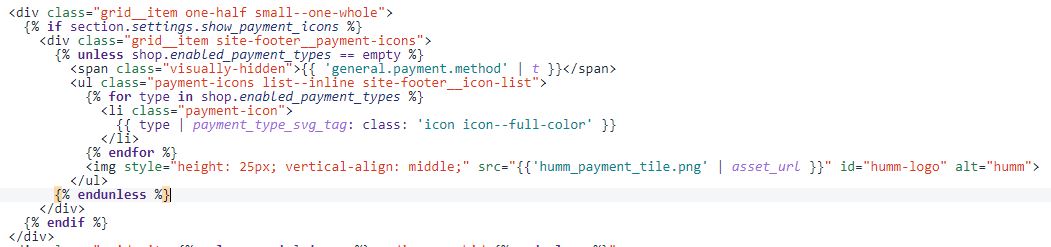
4. Navigate to Sections > footer.liquid. Press CTRL + F and search for payment.
5. Scroll to the bottom of the last highlighted payment, paste the below img tag after the {% endfor %}. Click Save.
<img style="height: 25px; vertical-align: middle;" src="{{'humm_payment_tile.png' | asset_url }}" id="humm-logo" alt="humm">
6. The humm payment tile should now be displayed at the bottom of your website.
NOTE: If the payment tile is not in line with the other payment methods, please remove
vertical-align: middle from the script.